The sfn command provides a collection of subcommands to handle stack
lifecycles as well as subcommands to aid in inspection of existing
stacks.
Stacks can be created via sfn using SparkleFormation templates or raw JSON
templates.
$ sfn create my-stack
sfn will prompt for selection of a template to build for this new stack. To
disable this prompting behavior, you can provide the path or name of the desired
template:
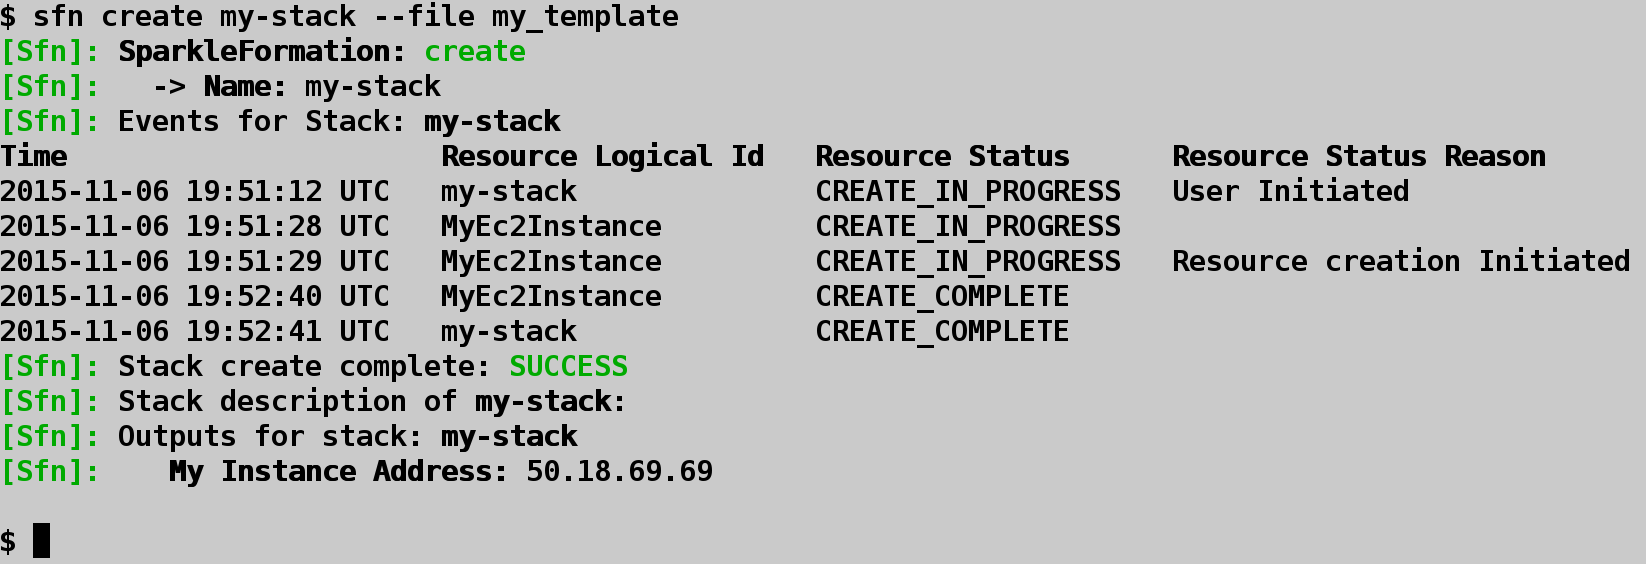
$ sfn create my-stack --file my_template
By default sfn will process and build SparkleFormation templates. To build a JSON
template, disable processing in the configuration file, or via flag:
$ sfn create my-stack --file ./my_template.json --no-processing
The create command is only responsible for initiating the stack creation with the
remote provider API. This does not report back the success or failure of the actual
stack creation. To provide this behavior, the create command will automatically poll
the stack’s resource events. Once the stack as reached a completed state, the create
command can properly notify of a success or failed state and exit with the proper
status code. The automatic polling behavior can be disabled:
$ sfn create my-stack --file my_template --no-poll
The --apply-stack option allows providing the name of an existing
stack when creating or updating. Applying stacks is simply fetching
the outputs from the applied stacks and automatically defaulting the
set parameter of the new or updated stack. Outputs are matched
by name to the parameters of the target stack. This allows an easy
way to use values from existing stacks when building new stacks.
Example:
StackA:
...
  "Outputs": {
    "LoadBalancerAddress": {
      "Description": "Address of Load Balancer",
      "Value": {
        "Fn::GetAtt": [
          "LoadBalancerResource",
          "DNSName"
        ]
      }
    }
  }
...
StackB:
...
  "Parameters": {
    "LoadBalancerAddress": {
      "Type": "String",
      "Default": "unset"
    }
  }
...
When creating StackB, if we use the --apply-stack option:
$ sfn create StackB --apply-stack StackA
when prompted for the stack parameters, we will find the parameter
value for LoadBalancerAddress to be filled in with the output
provided from StackA.
Stacks that are defined in a different region, or within a
different provider, can be applied by prefixing stack names with
the configured location name. Using the defined .sfn configuration:
Configuration.new do
  ...
  credentials do
    provider :aws
    aws_access_key_id ENV['AWS_ACCESS_KEY_ID']
    aws_secret_access_key ENV['AWS_SECRET_ACCESS_KEY']
    aws_region 'us-west-2'
  end
  locations do
    ca_west do
      provider :aws
      aws_access_key_id ENV['AWS_ACCESS_KEY_ID']
      aws_secret_access_key ENV['AWS_SECRET_ACCESS_KEY']
      aws_region 'us-west-1'
    end
  end
end
Now, when creating a new stack (which uses the configured credentials
targeting us-west-2) a stack from the us-west-1 region can be applied
by prefixing the location name to the stack name:
$ sfn create StackB --apply-stack ca_west__StackA
NOTE: Location providers are not required to be common.
Example of stack creation:
Existing stacks can be updated via sfn:
$ sfn update my-stack
This will start an “in place” update. Only the parameters of the stack are updated. To update the template of the stack as well:
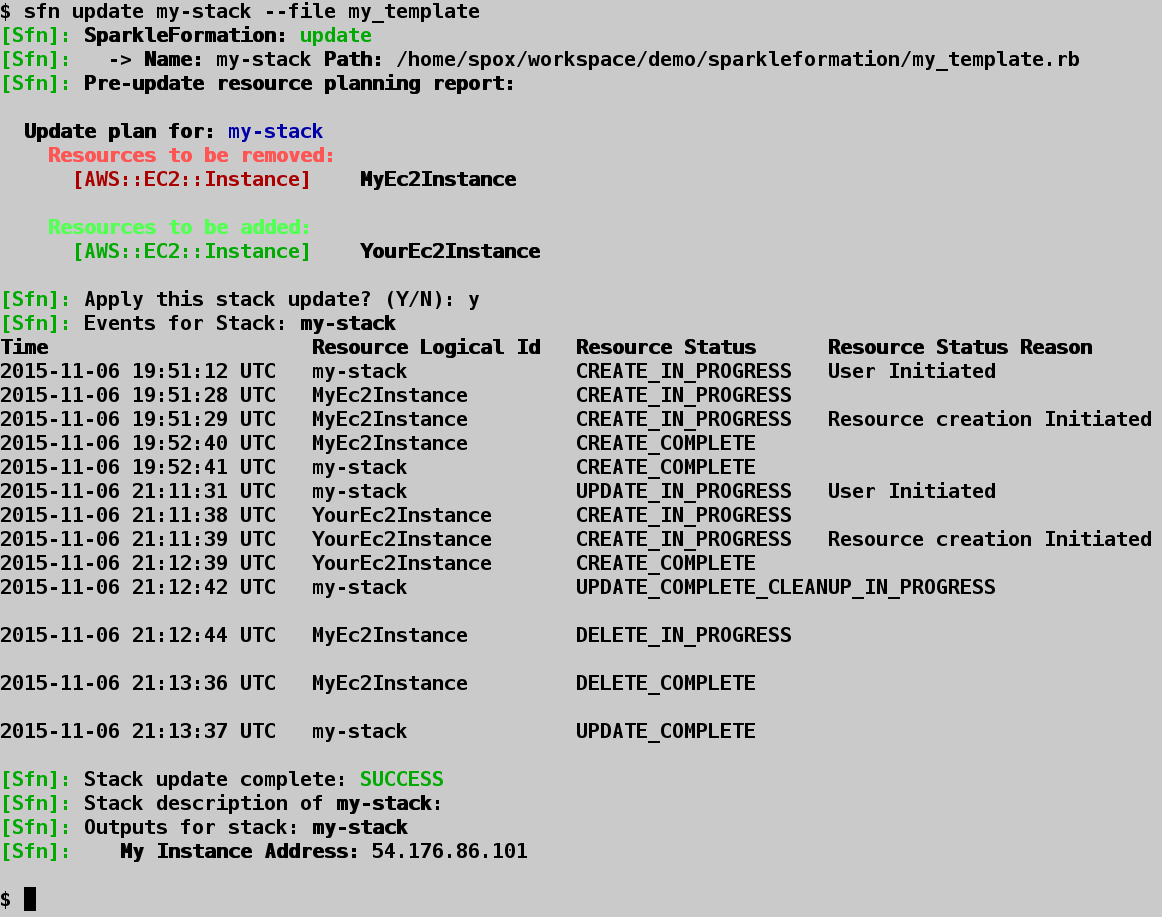
$ sfn update my-stack --file my_template
The update command behaves like the create command. It is only responsible for initiating
the request with the remote provider API. It will poll the stack events to detect final stack
state. The polling can be disabled:
$ sfn update my-stack --file my_template --no-poll
Example of stack update:
The plan command allows for a stack to be created or updated via sfn. It uses the
planning functionality of the provider to include planning information prior to
application of the creation/modifications. The plan command is currently only
supported with the AWS provider. When using the update command, the plan generation
uses the internal planner with sfn and supports showing resource for nested stacks.
This is currently not supported with the remote planning API.
Available options for the plan command are similar to the create and update
commands. Additionally, available plans can be listed for a given stack:
$ sfn plan my-stack --list
By default the plan will be created with a default name (miasma-changeset-STACKNAME). A
custom name can be used for the plan:
$ sfn plan my-stack --file my_template --plan-name custom-plan-name
It is also possible to apply an existing plan for a stack by providing the plan name:
$ sfn plan my-stack --plan-name existing-plan-name
The realize command loads an existing plan for a given stack and executes the plan. This
is useful to allow generating plans and then executing a plan at a later time. For example
a stack plan can be first generated and not applied:
$ sfn plan my-stack --file my_template --plan-only
This generates the plan and displays the result but does not apply the changes. The plan
can then be loaded and applied using the realize command:
$ sfn realize my-stack
Existing stacks can be destroyed via sfn:
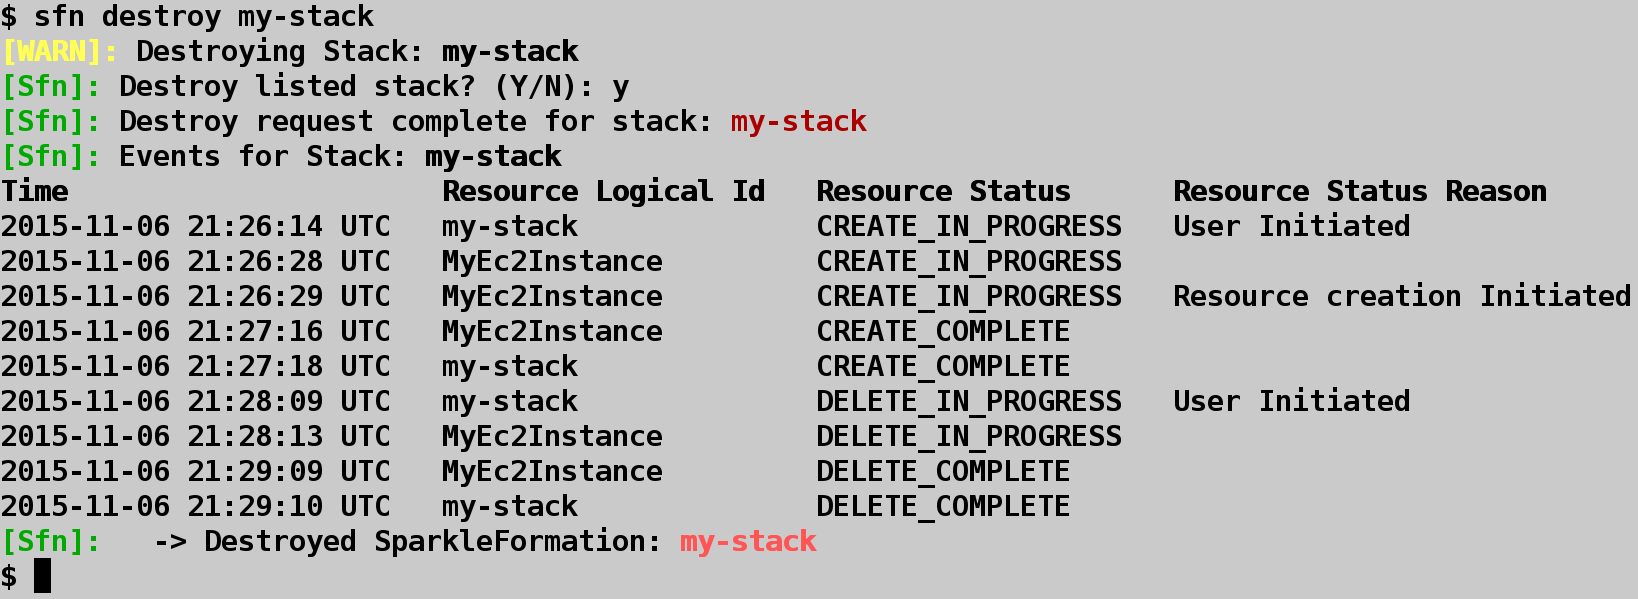
$ sfn destroy my-stack
By default a confirmation prompt will be provided prior to destroying an existing stack. This can be disabled by automatically confirming:
$ sfn destroy my-stack --yes
The destroy command will poll the stack resource events until the stack has been successfully
deleted, or has reached a “complete” state (which would indicate a failure to destroy). The polling
can be disabled:
$ sfn destroy my-stack --yes --no-poll
The destroy command also provides glob support when specifying stack names. This can make cleanup
very easy when multiple testing stacks may exist:
$ sfn destroy my-stack-*
This will destroy all stacks whose name start with my-stack-. The command will prompt for confirmation
and provide a list of all matching stacks prior to destruction.
Example of stack destroy:
To list existing stacks:
$ sfn list
Example of a stack list:

A description of an existing stack will display resources allocated to the stack and any outputs that were defined within the stack’s template:
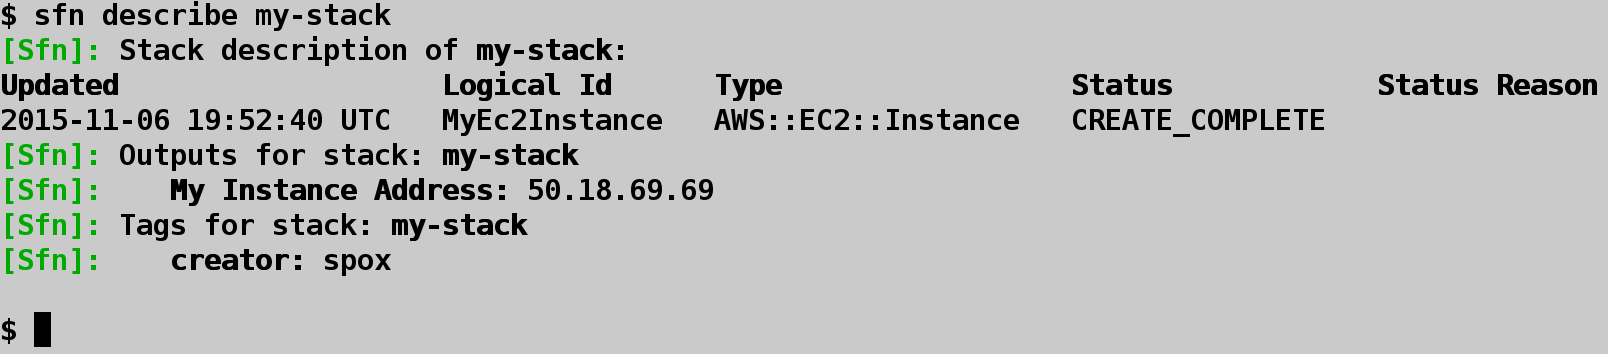
$ sfn describe my-stack
If the stack contains nested stacks, it will display the resources and outputs for those stacks as well.
To describe only resources:
$ sfn describe my-stack --resources
To describe only outputs:
$ sfn describe my-stack --outputs
Example of a stack describe:
List the events genereted by the resources allocated to an existing stack:
$ sfn events my-stack
If the resources within the stack are currently being modified (via a create, update, or destroy)
command, the events can be polled until the stack reaches a completed state:
$ sfn events my-stack --poll
Example of stack events:

Existing stacks can have their resources inspected via sfn using the miasma model API. The inspect
command provides the ability to directly access resource information where the miasma library has
modeling support enabled.
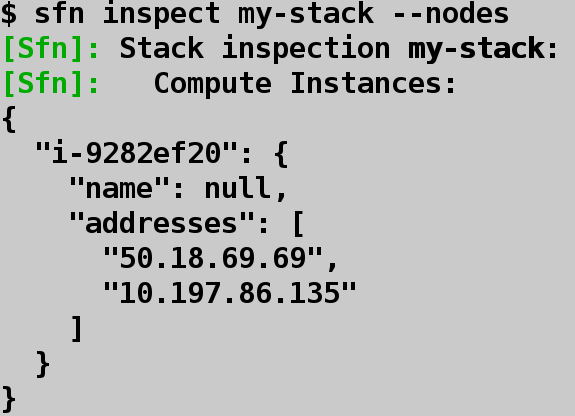
One builtin helper for the inspect command is listing all compute resources available within a stack.
This includes standalone compute instances as well as compute instances attached to auto-scaling groups
defined within the stack.
$ sfn inspect my-stack --nodes
Example of stack node inspection:
When run with no options, the inspect command will output the data model information of the stack:
$ sfn inspect my-stack
Individual items can be displayed using the attribute flag:
$ sfn inspect my-stack --attribute template
The attribute flag is gets applied to the miasma data model and will output the result of request. For example, if the stack consisted of one resource, and that resource was a compute instance, we could view the resource information from the orchestration API point of view:
$ sfn inspect my-stack --attribute "resources.all.first"
The information here will be sparse because the orchestration API only keeps a reference to the actual resource within its own system. Because the miasma library has compute modeling defined, we can utilize the library to automatically load the compute instance:
$ sfn inspect my-stack --attribute "resources.all.first.expand"
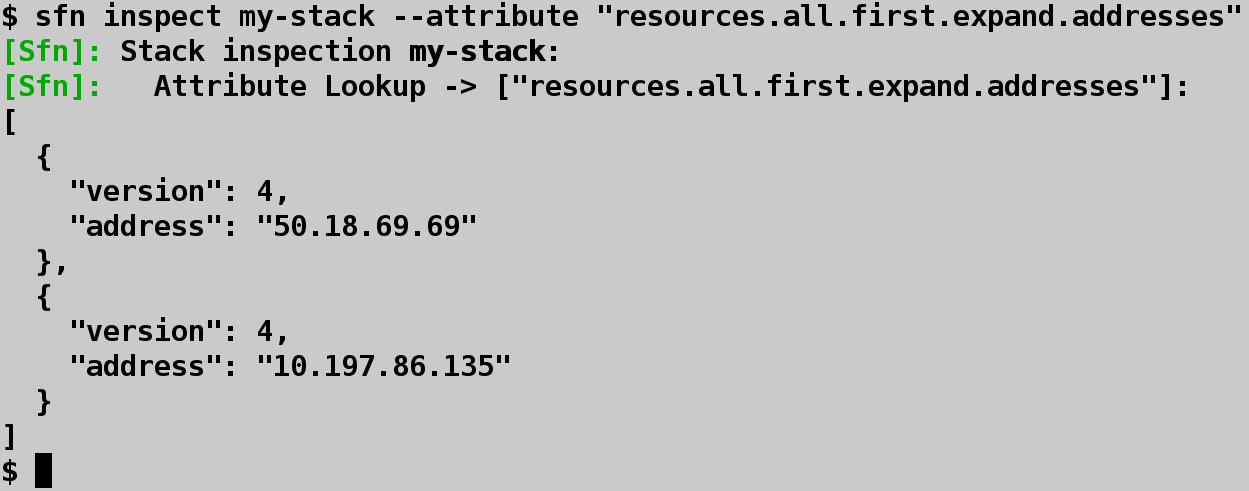
If only the addresses allocated to the compute instance were desired, that can be requested:
$ sfn inspect my-stack --attribute "resources.all.first.expand.addresses"
Example of stack attribute inspection
To display a generated template:
$ sfn print --file my_template
Templates can be validated with the remote provide API prior to creation:
$ sfn validate --file my_template
If the template is a JSON style template, disable processing:
$ sfn validate --file my_template --no-processing
Example of stack validate:

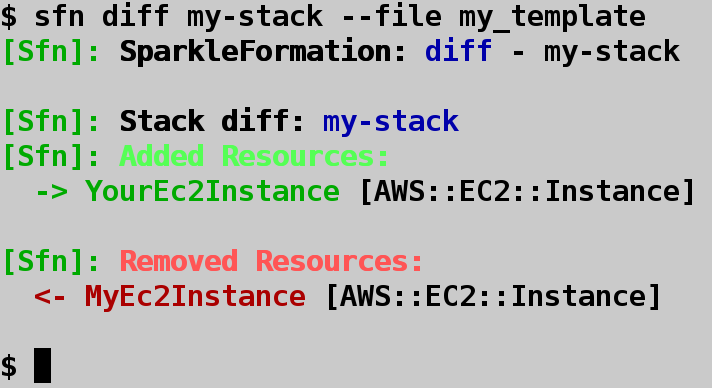
Template updates can be diff’ed against an existing stack’s template to display information about what resource modifications will be introduced by the new template:
$ sfn diff my-stack --file my_template
Example of stack diff:
Creation or dependency graphs can be created via sfn. Two styles of the graph can be
generated:
"creation" - Resource creation flow (default)"dependency" - Resource dependency compositionTo generate a graph:
$ sfn graph --file my_template --graph-style dependency
By default the graph command will create a Graphviz compatible dot format file. If Graphviz is installed on the local system, an image can be generated directly:
$ sfn graph --file my_template --graph-type png
To aid setup and configuration, sfn provides a configuration helper:
$ sfn conf
This will display the current configuration. If no configuration file is present, the user can have one automatically generated for them:
$ sfn conf --generate